This guide will show you how to add your email account as a IMAP account to Apple Mail on macOS. You will need to know your email address and email password and we will be using the server settings that are mentioned on this page here.
Step 1
Open up Apple Mail and click on "Mail" in the top left hand corner and then choose "Preferences" as shown in the screenshot below.

Step 2
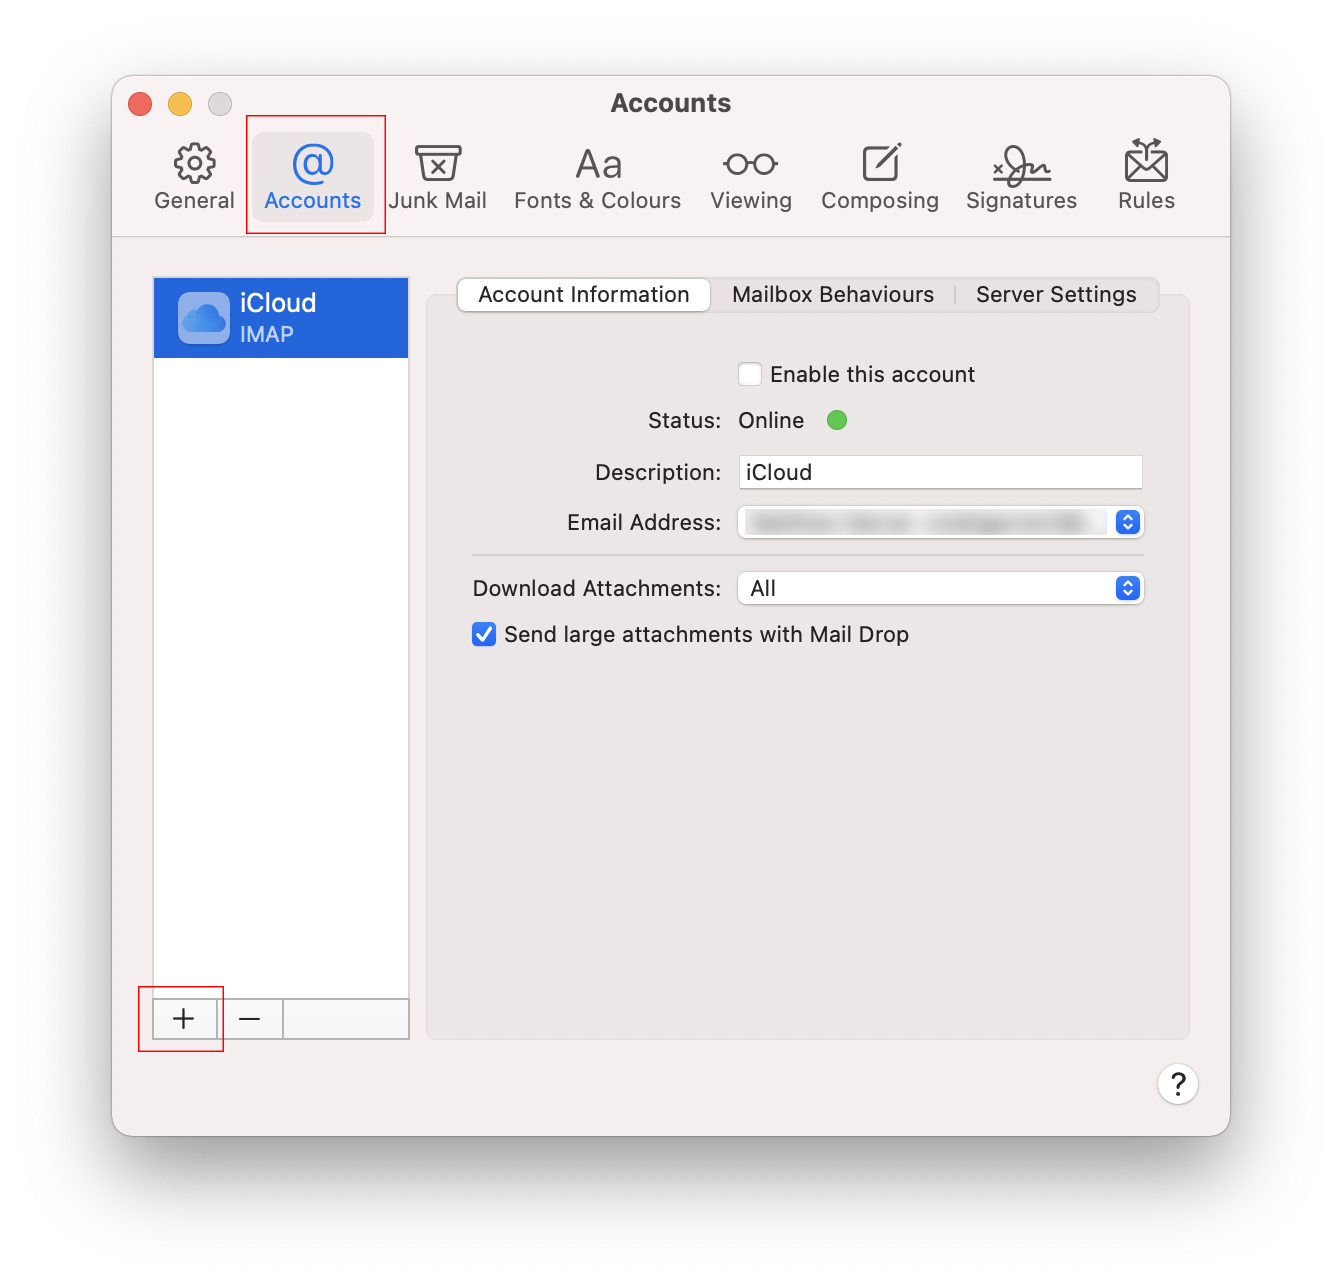
Click on "Accounts" and then click on the + sign in the bottom left hand corner of the window. As shown in the screenshot below.
Step 3
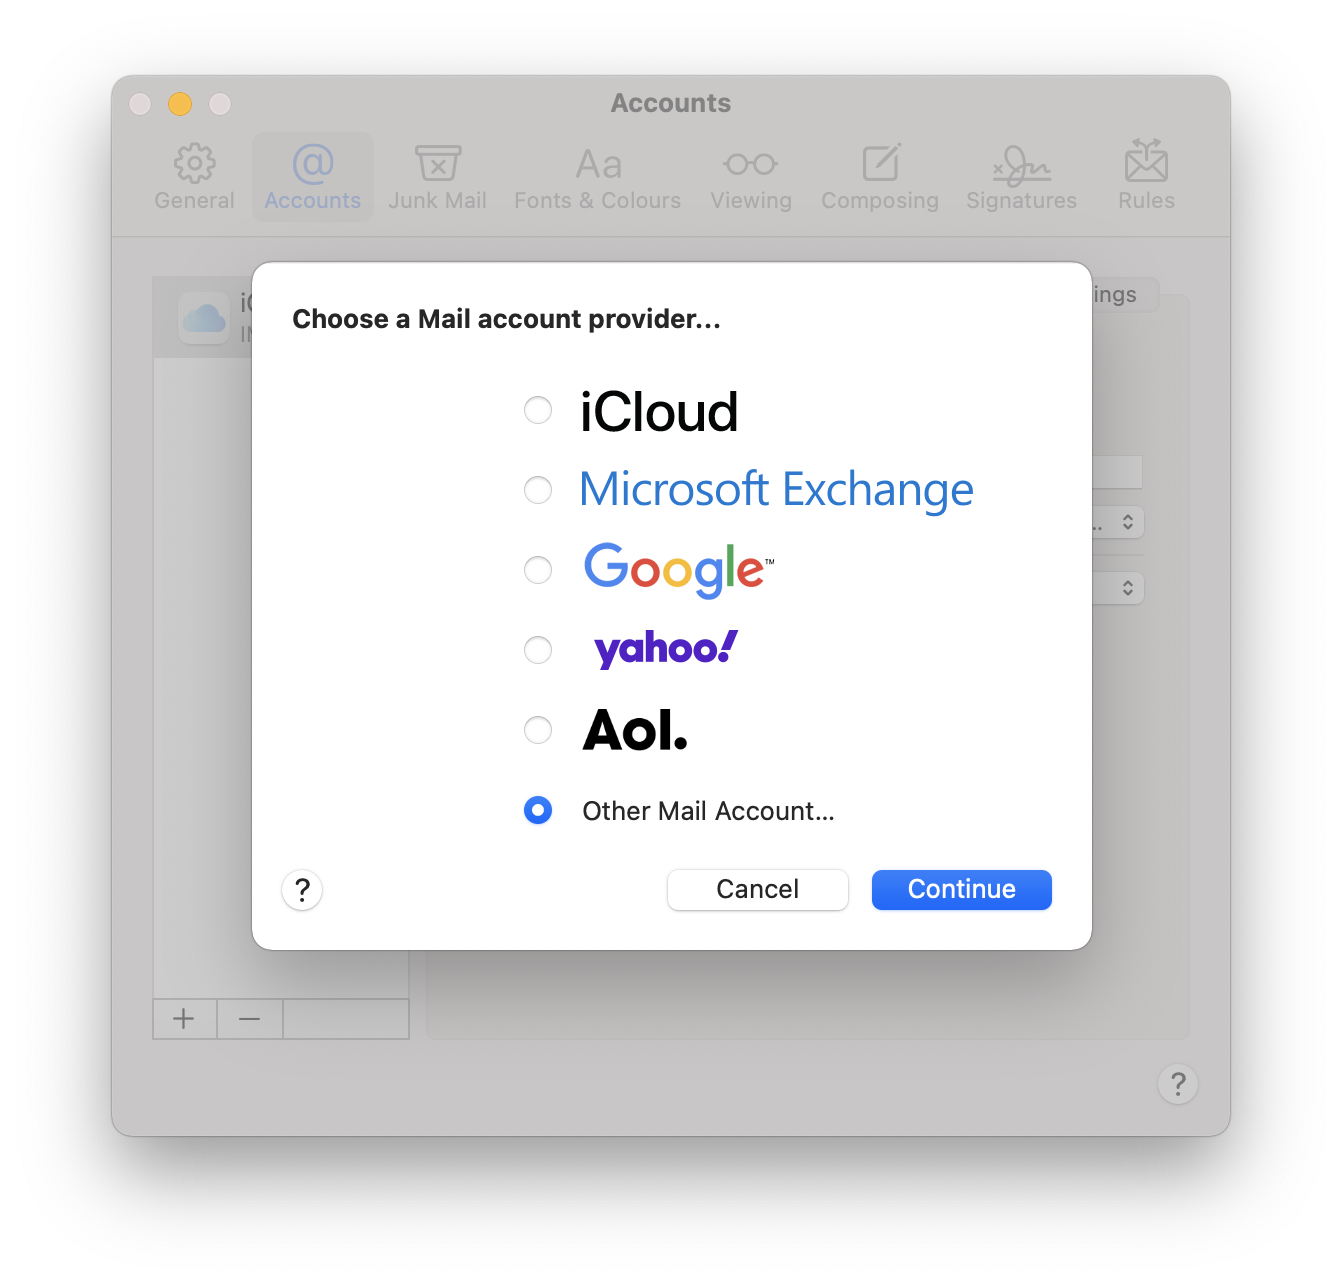
You will now be chosen a window where you chose your mail account provider. You will need to choose the bottom option that says "Other Mail Account" as shown in the screenshot below. Then press Continue.
Step 4
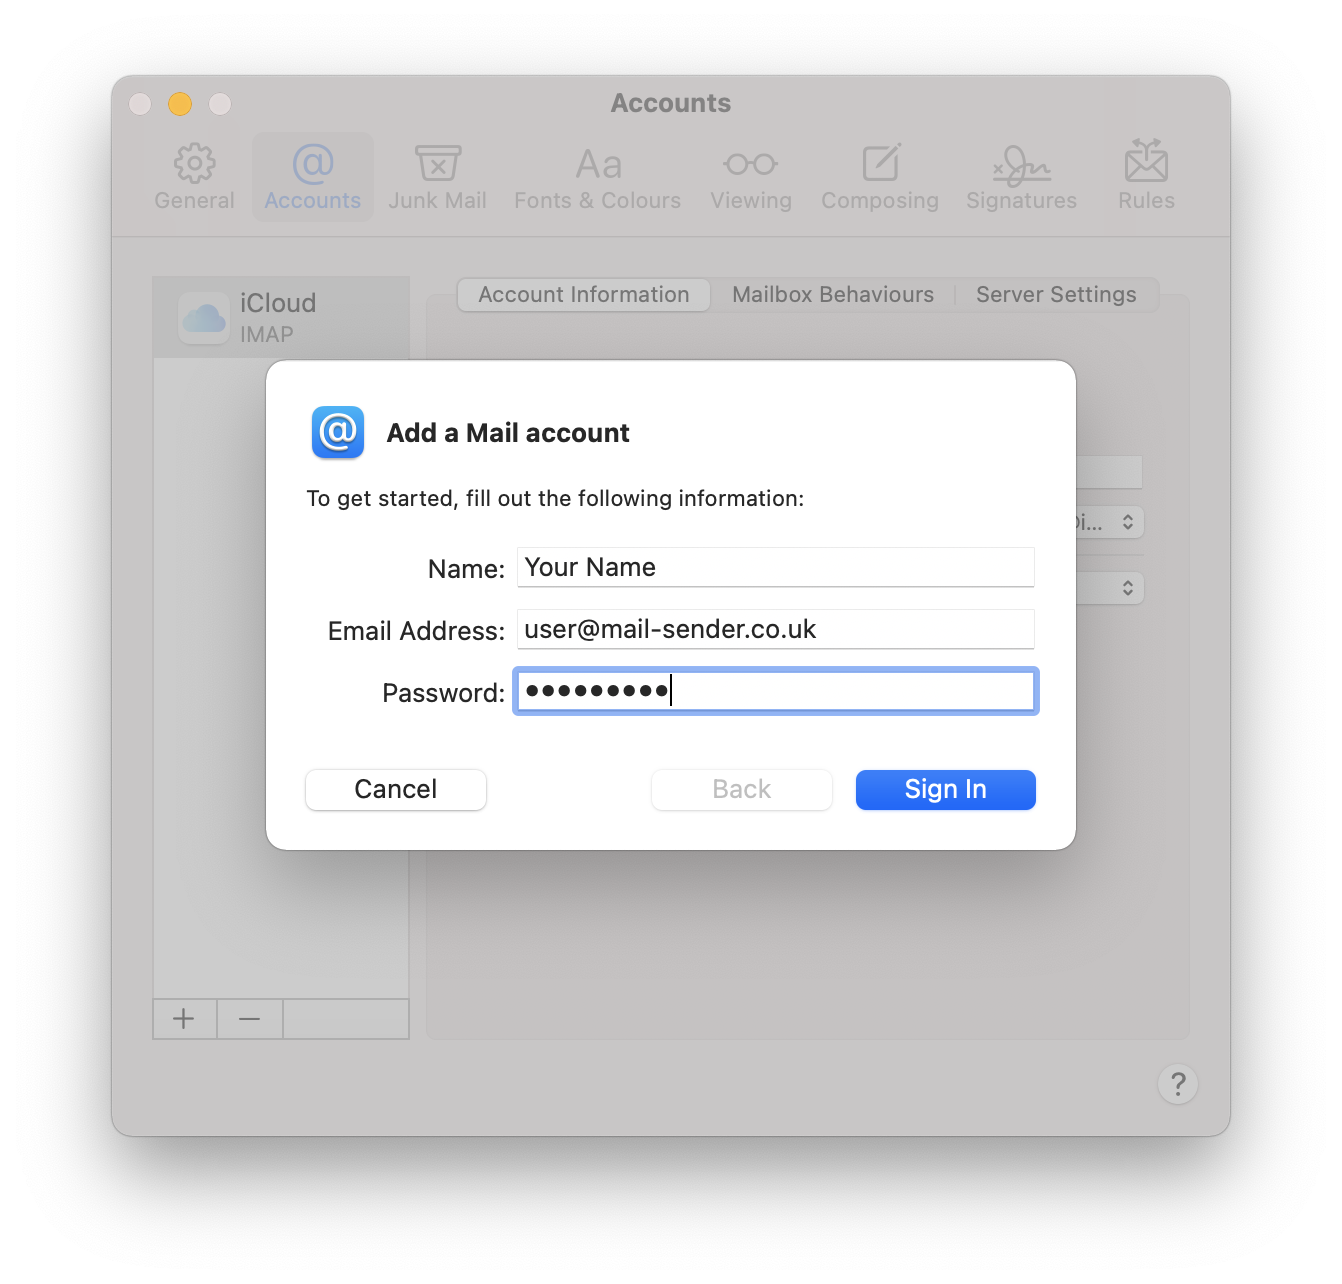
Fill in the details that it asks for - Such as your name, the email address and your email password and then press "Sign In".
Step 5
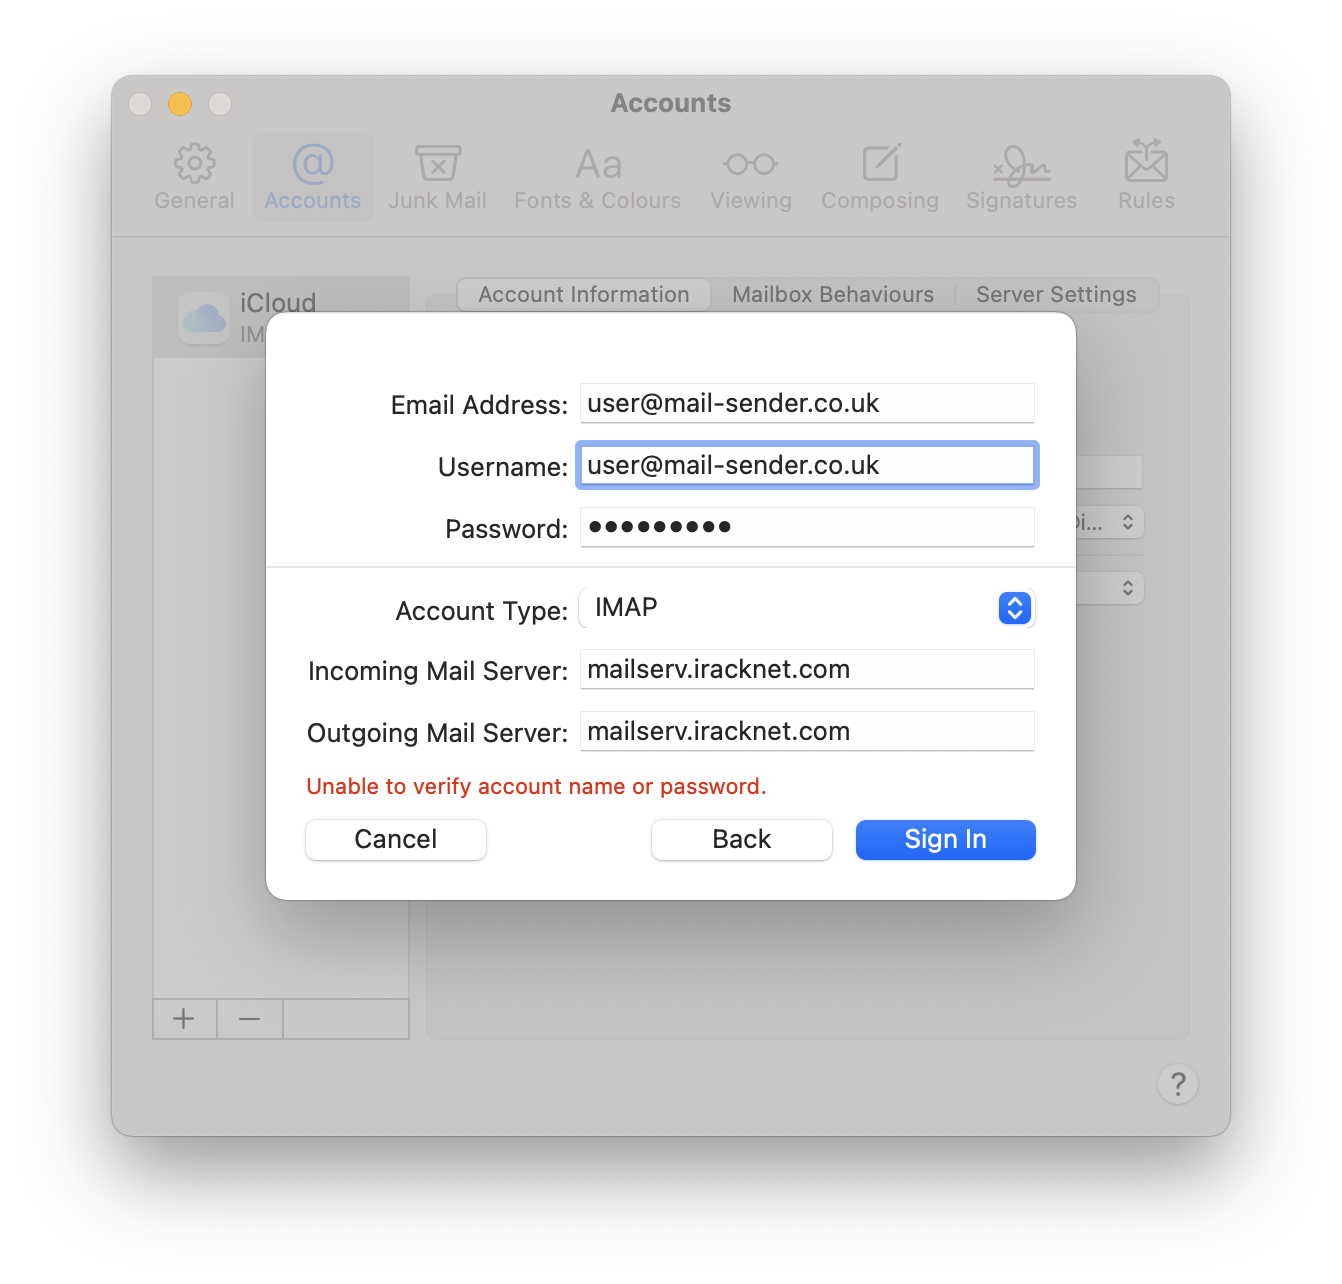
Make sure the email address and username boxes are filled in with your full email address. Make sure the correct email password is filled in and then ensure the account type is set to "IMAP".
Then you need to enter the incoming and outgoing mail server which is mailserv.iracknet.com. Before clicking sign in, check that the email address/username and password boxes are still filled in. Once you have confirmed that, click on the "Sign in
Step 6
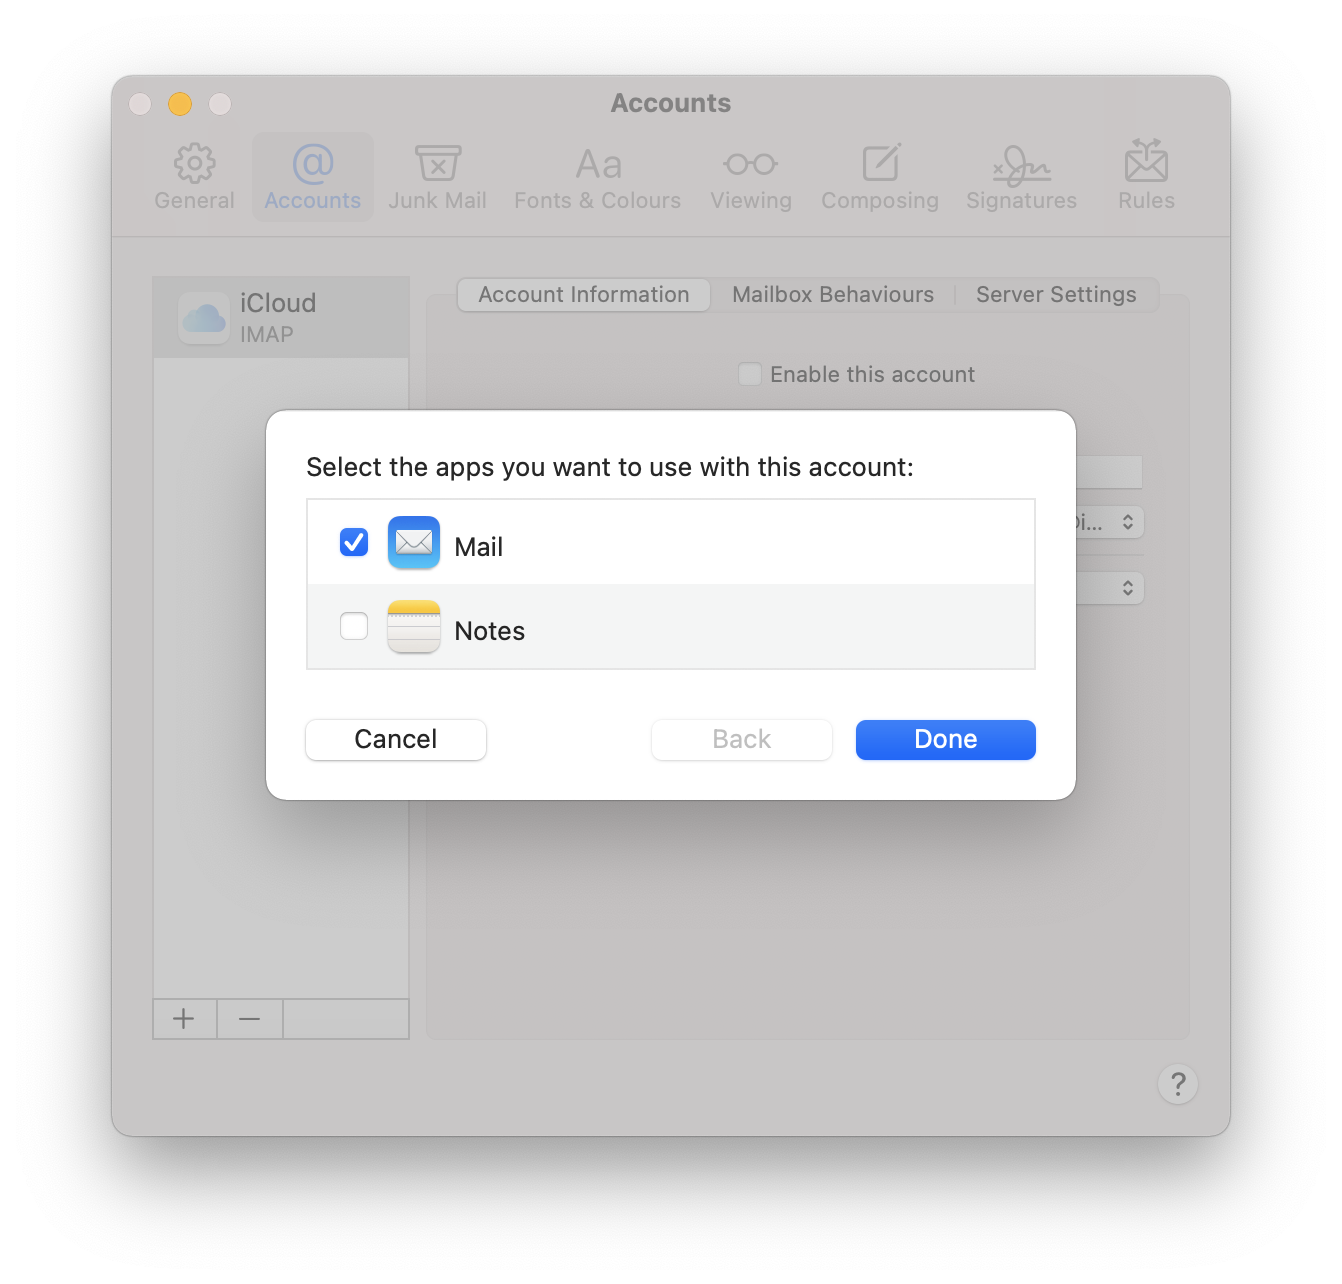
Make sure that "Mail" is ticked and then click on "Done".
Step 7
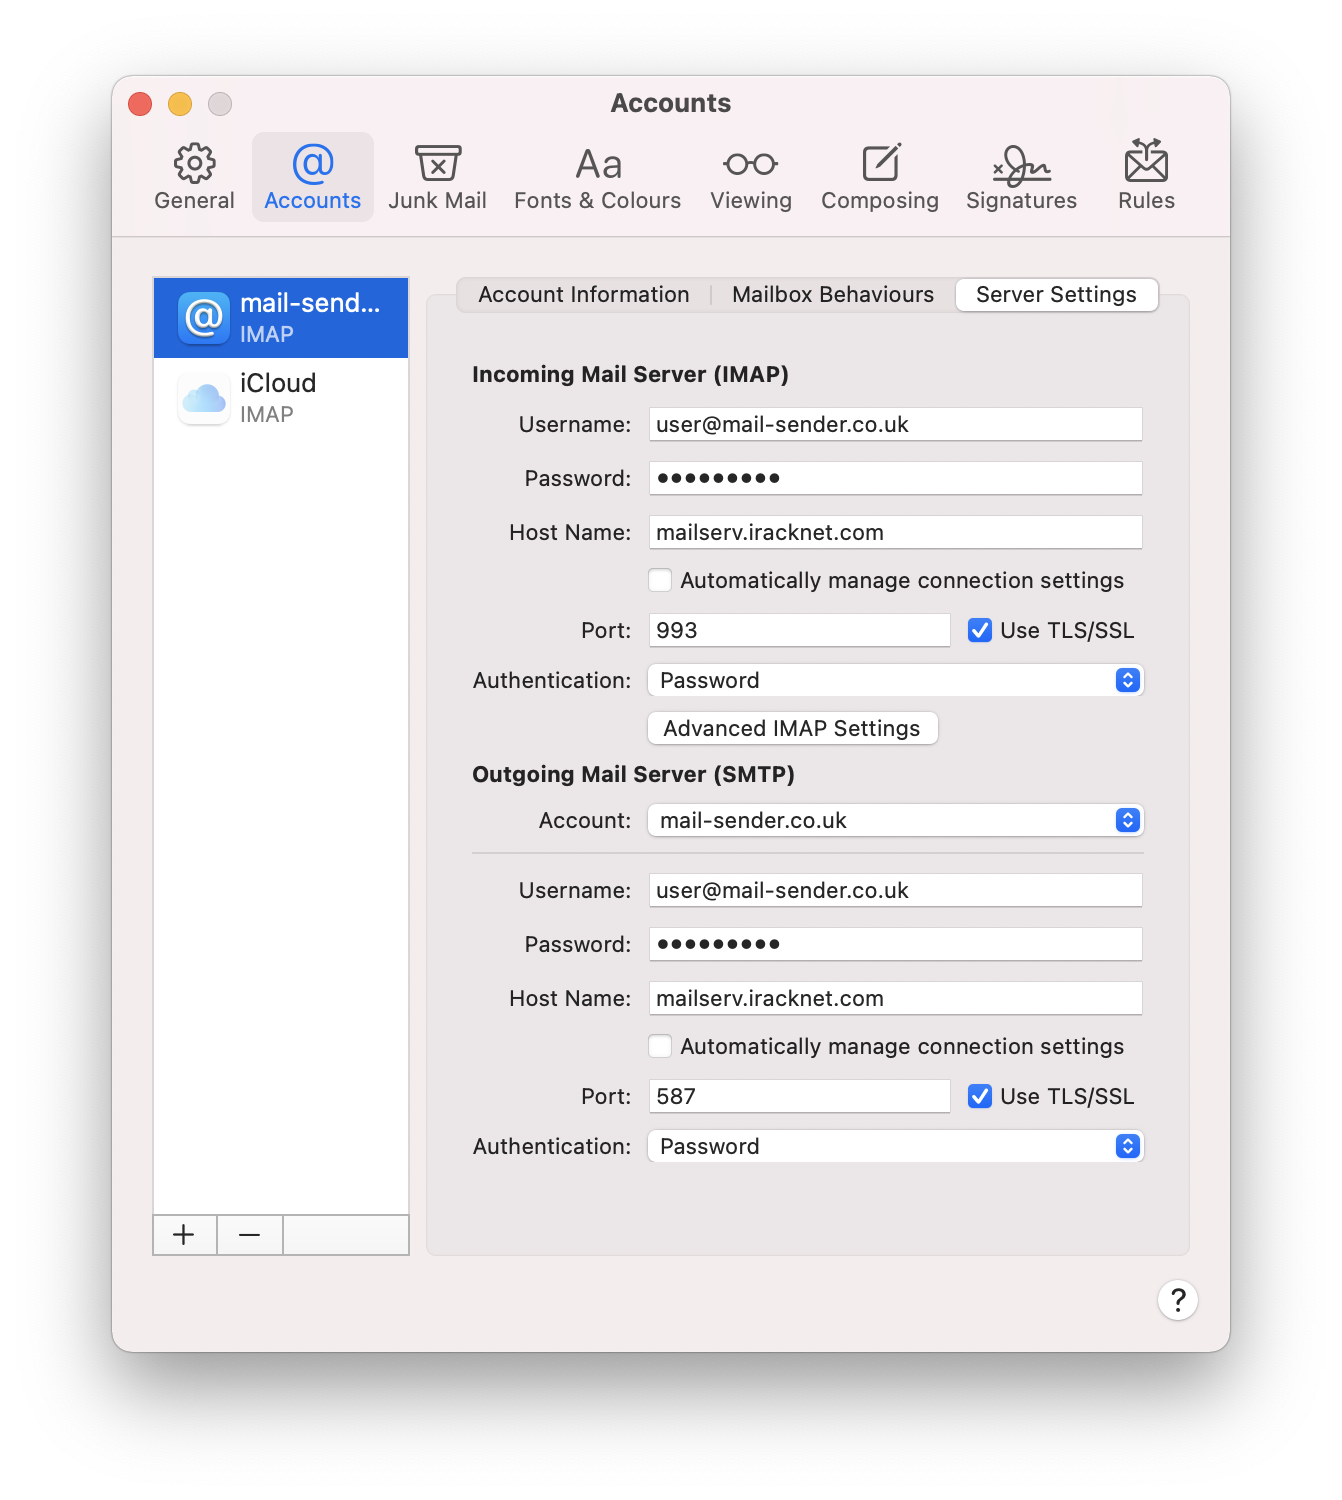
Click on "Server Settings" and check over the settings to make sure they are correct. The only difference to the settings you see below compared to yours, should be the username and password fields would be your own.
Step 8
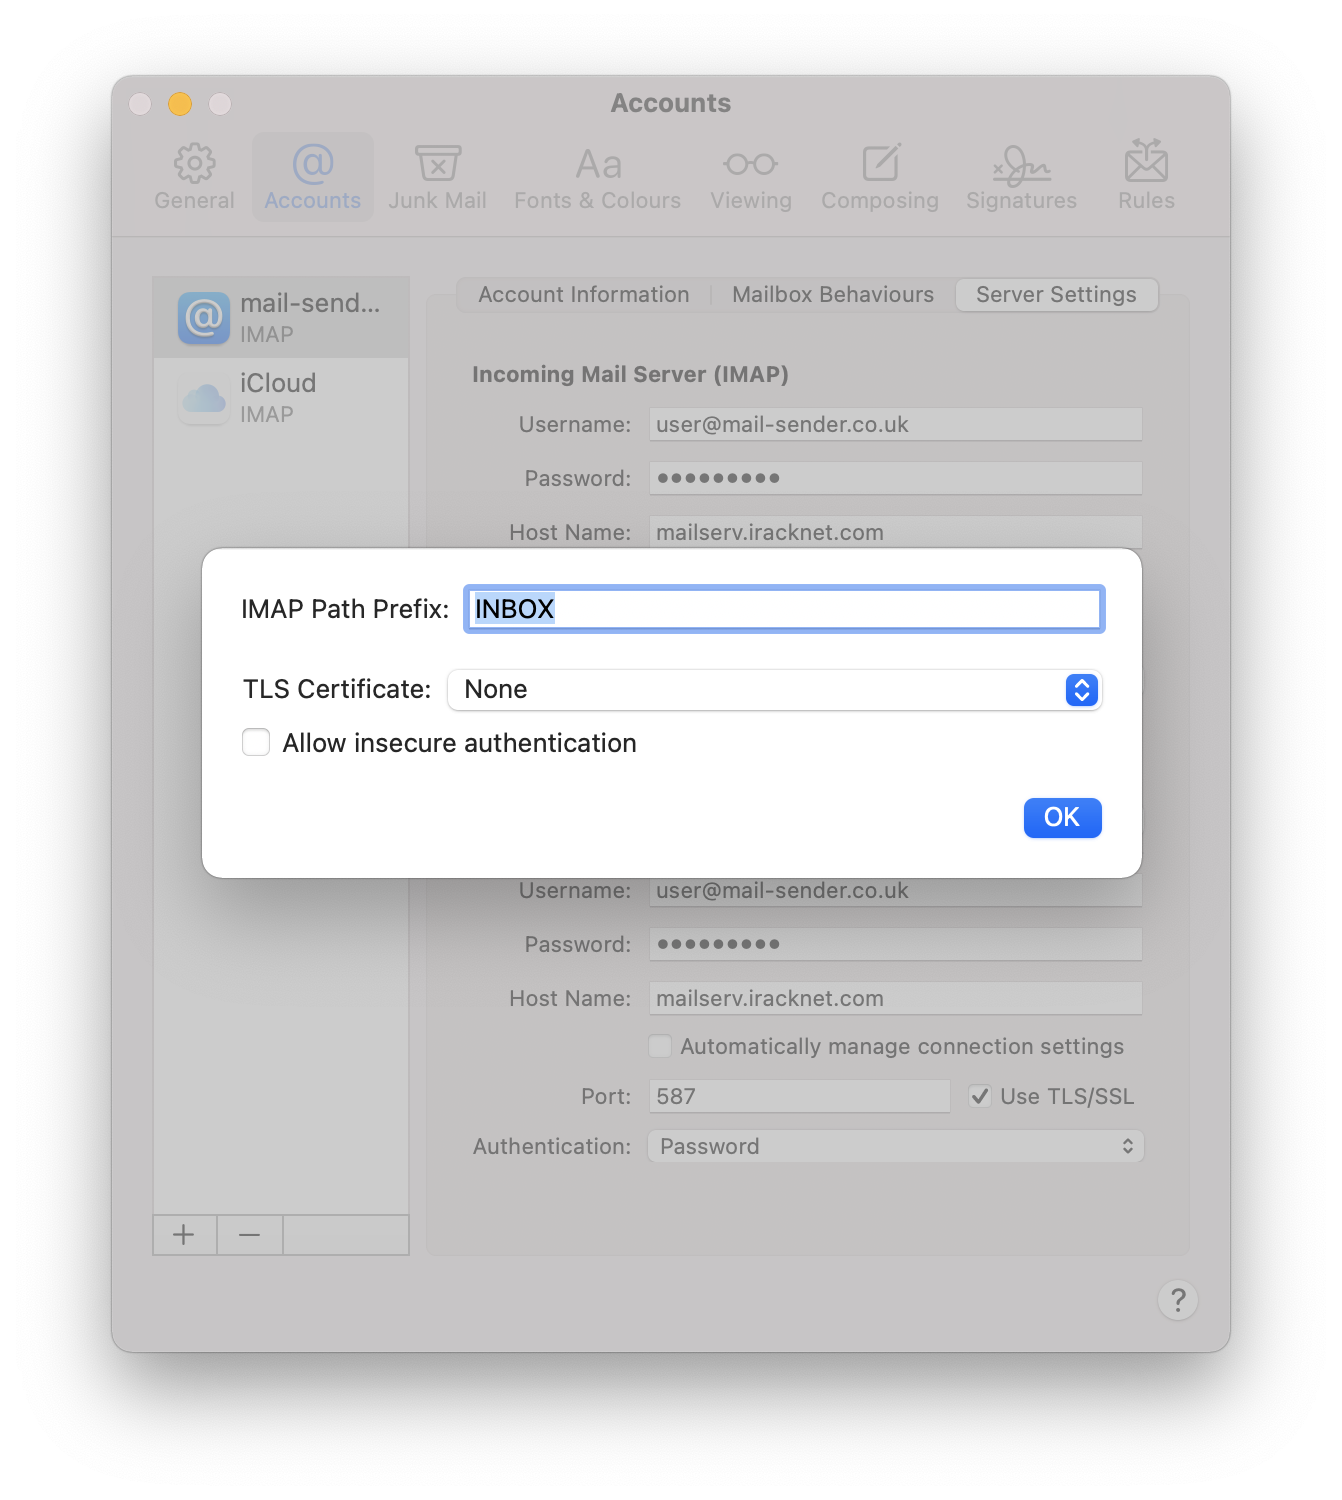
Click on "Advanced IMAP Settings" and make sure the word INBOX is in the IMAP root folder prefix box.
Step 8
The account should now be able to send and receive emails.

