This guide will show you how to add your email account as a POP account to the Gmail app on Android. You will need to know your email address and email password to be able to follow this guide.
Step 1
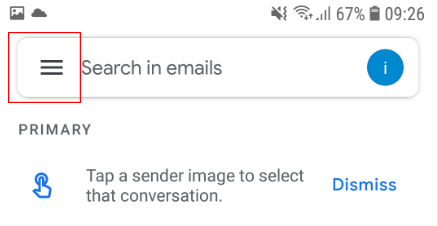
Click on the hamburger menu in the top left hand side of the Gmail app and then choose "Settings" - This is located near the bottom so you may have to scroll depending on the size of your phone screen.
Step 2
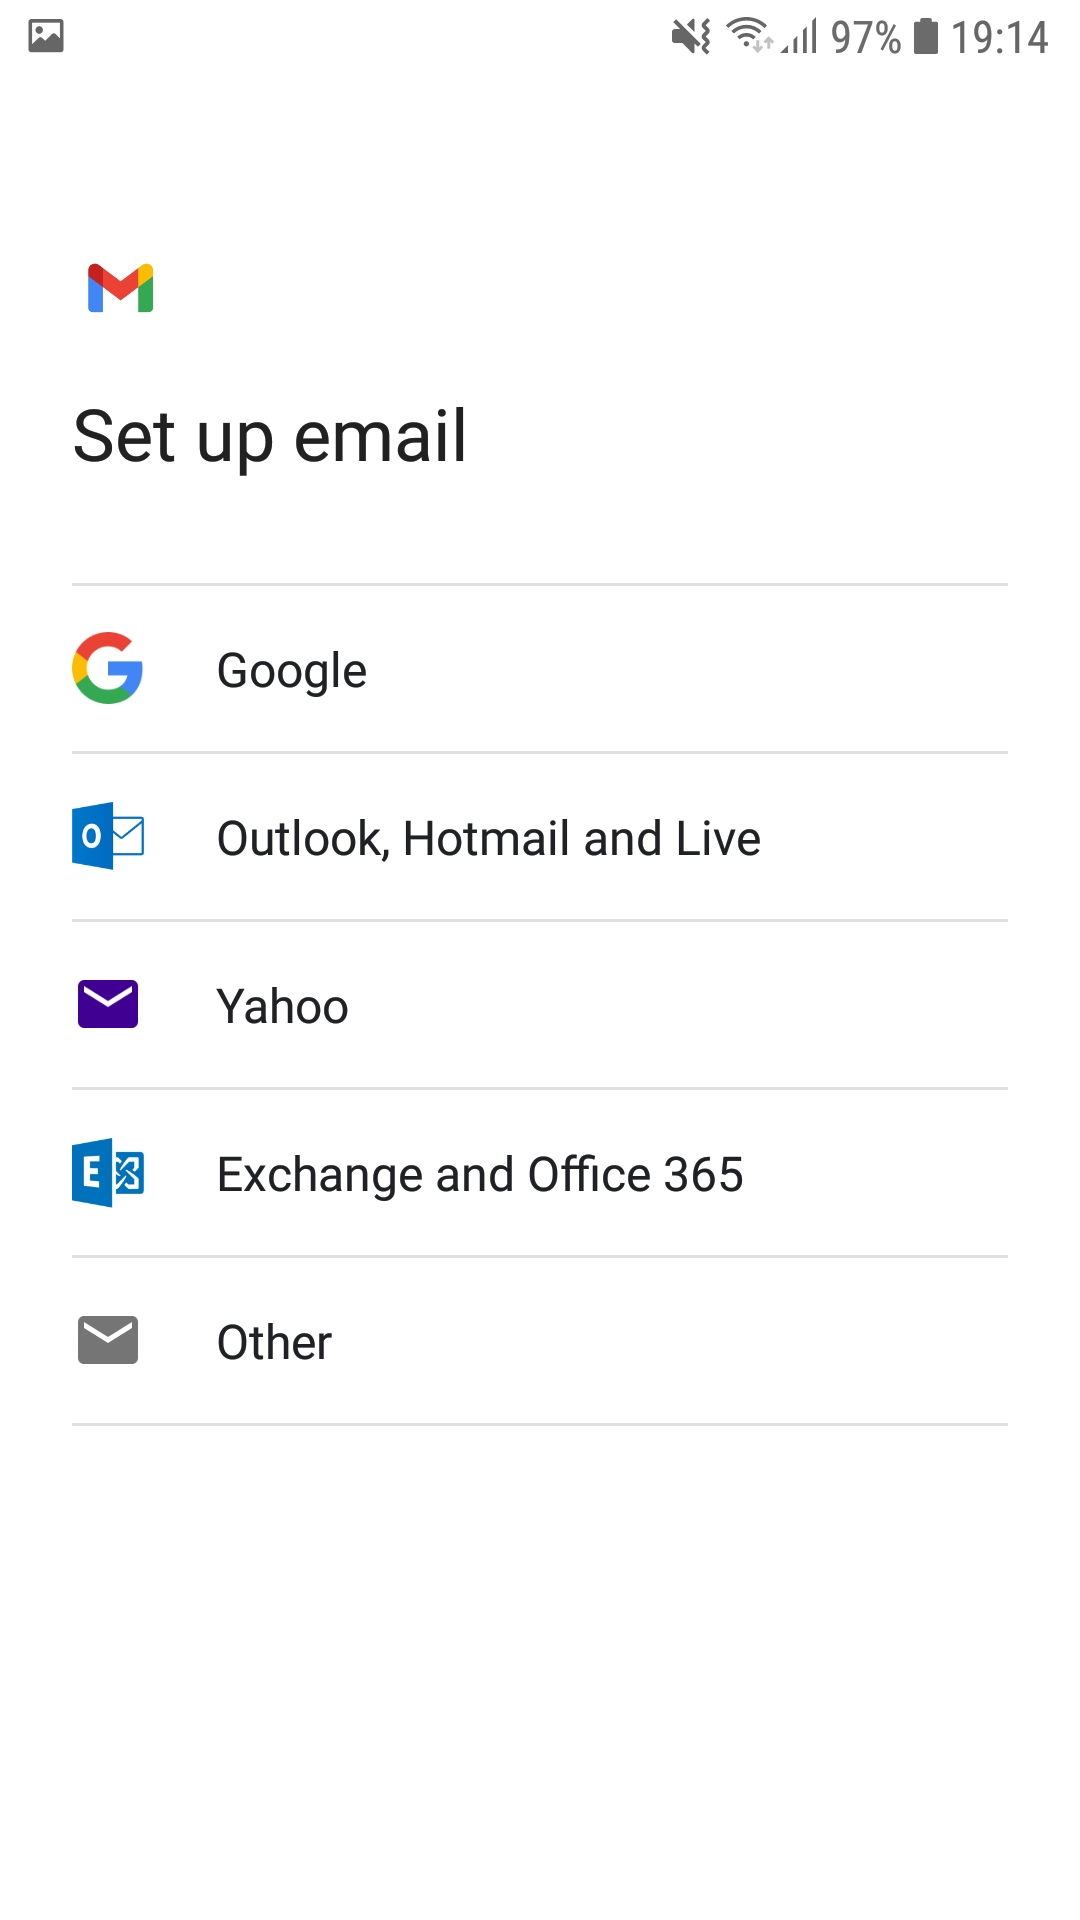
Click on "Add Account" and you will then be shown the options that the screenshot below shows:
Step 3
Choose the "Other" option at the bottom page.
Step 4
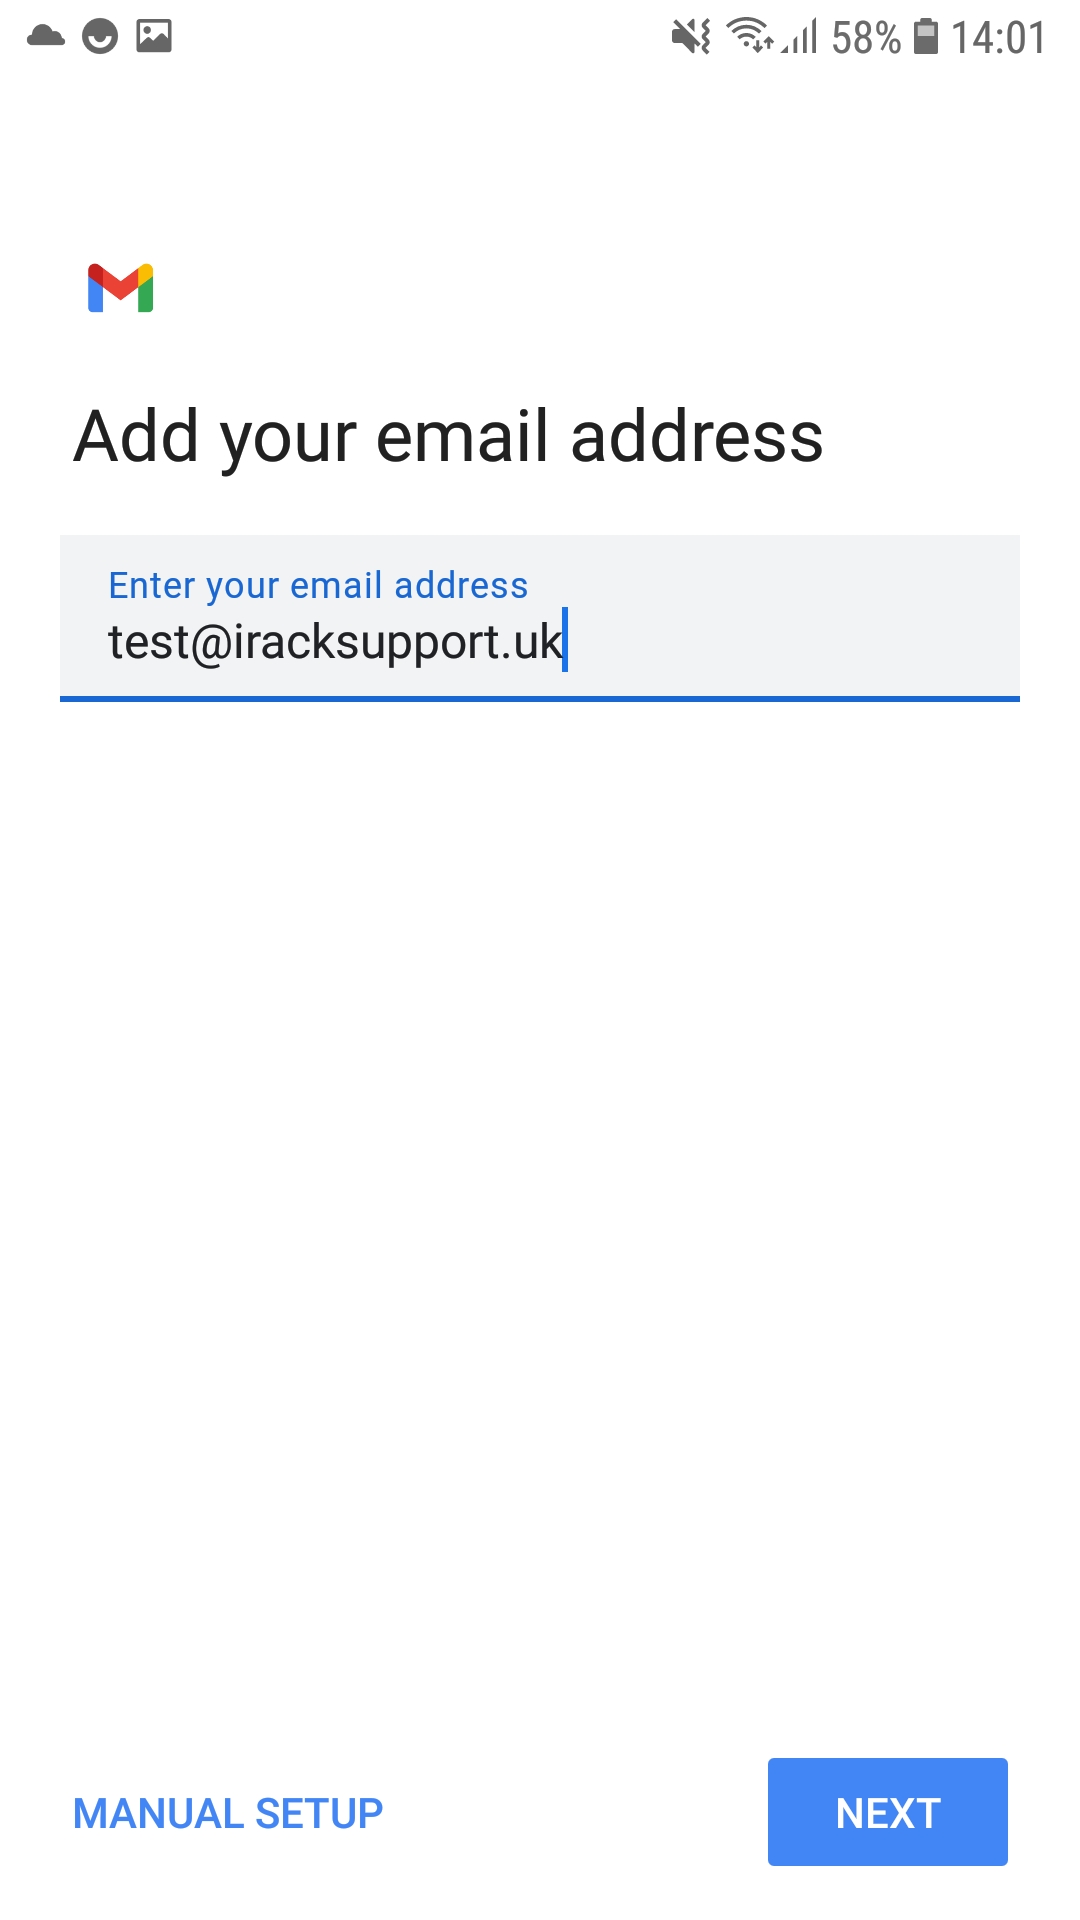
Enter your email address and then press "Manual Setup"
Step 5
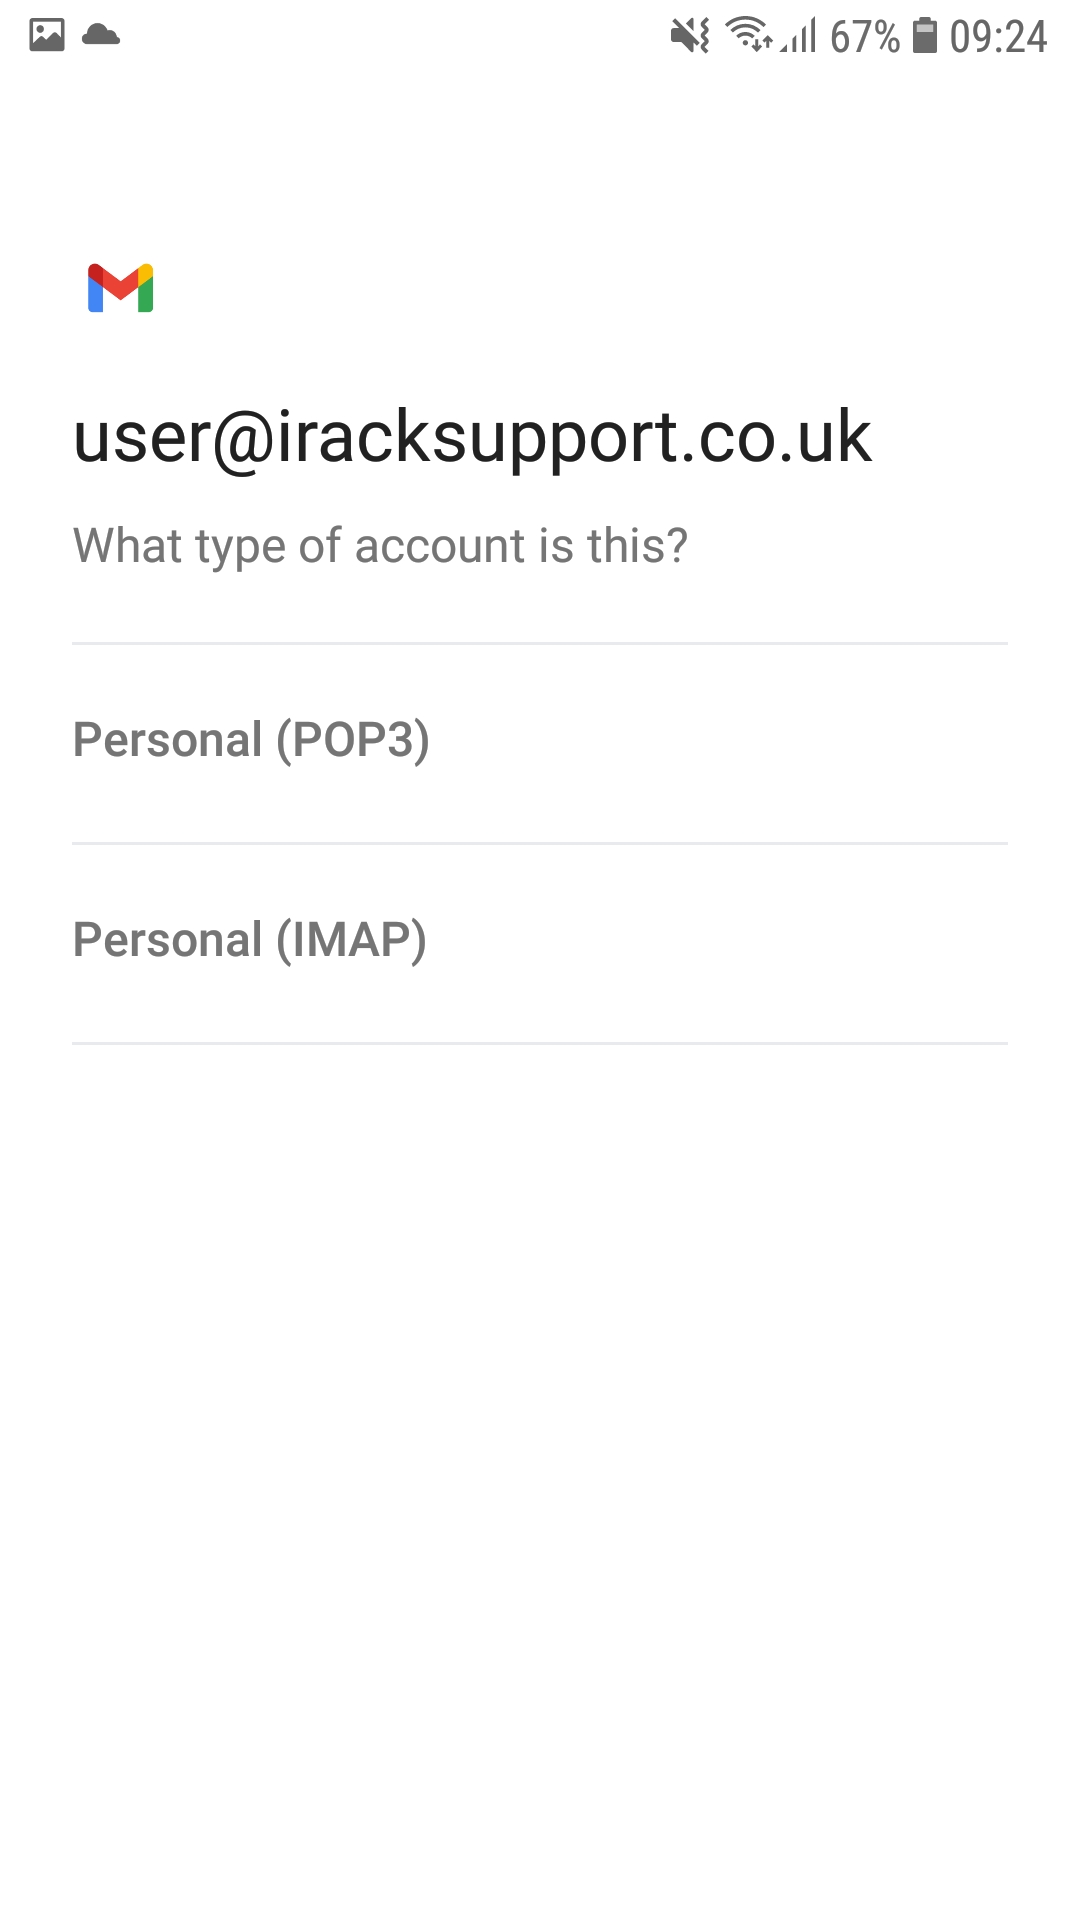
It will ask you what type of account this will be - In this guide you will chose POP3.
Step 6
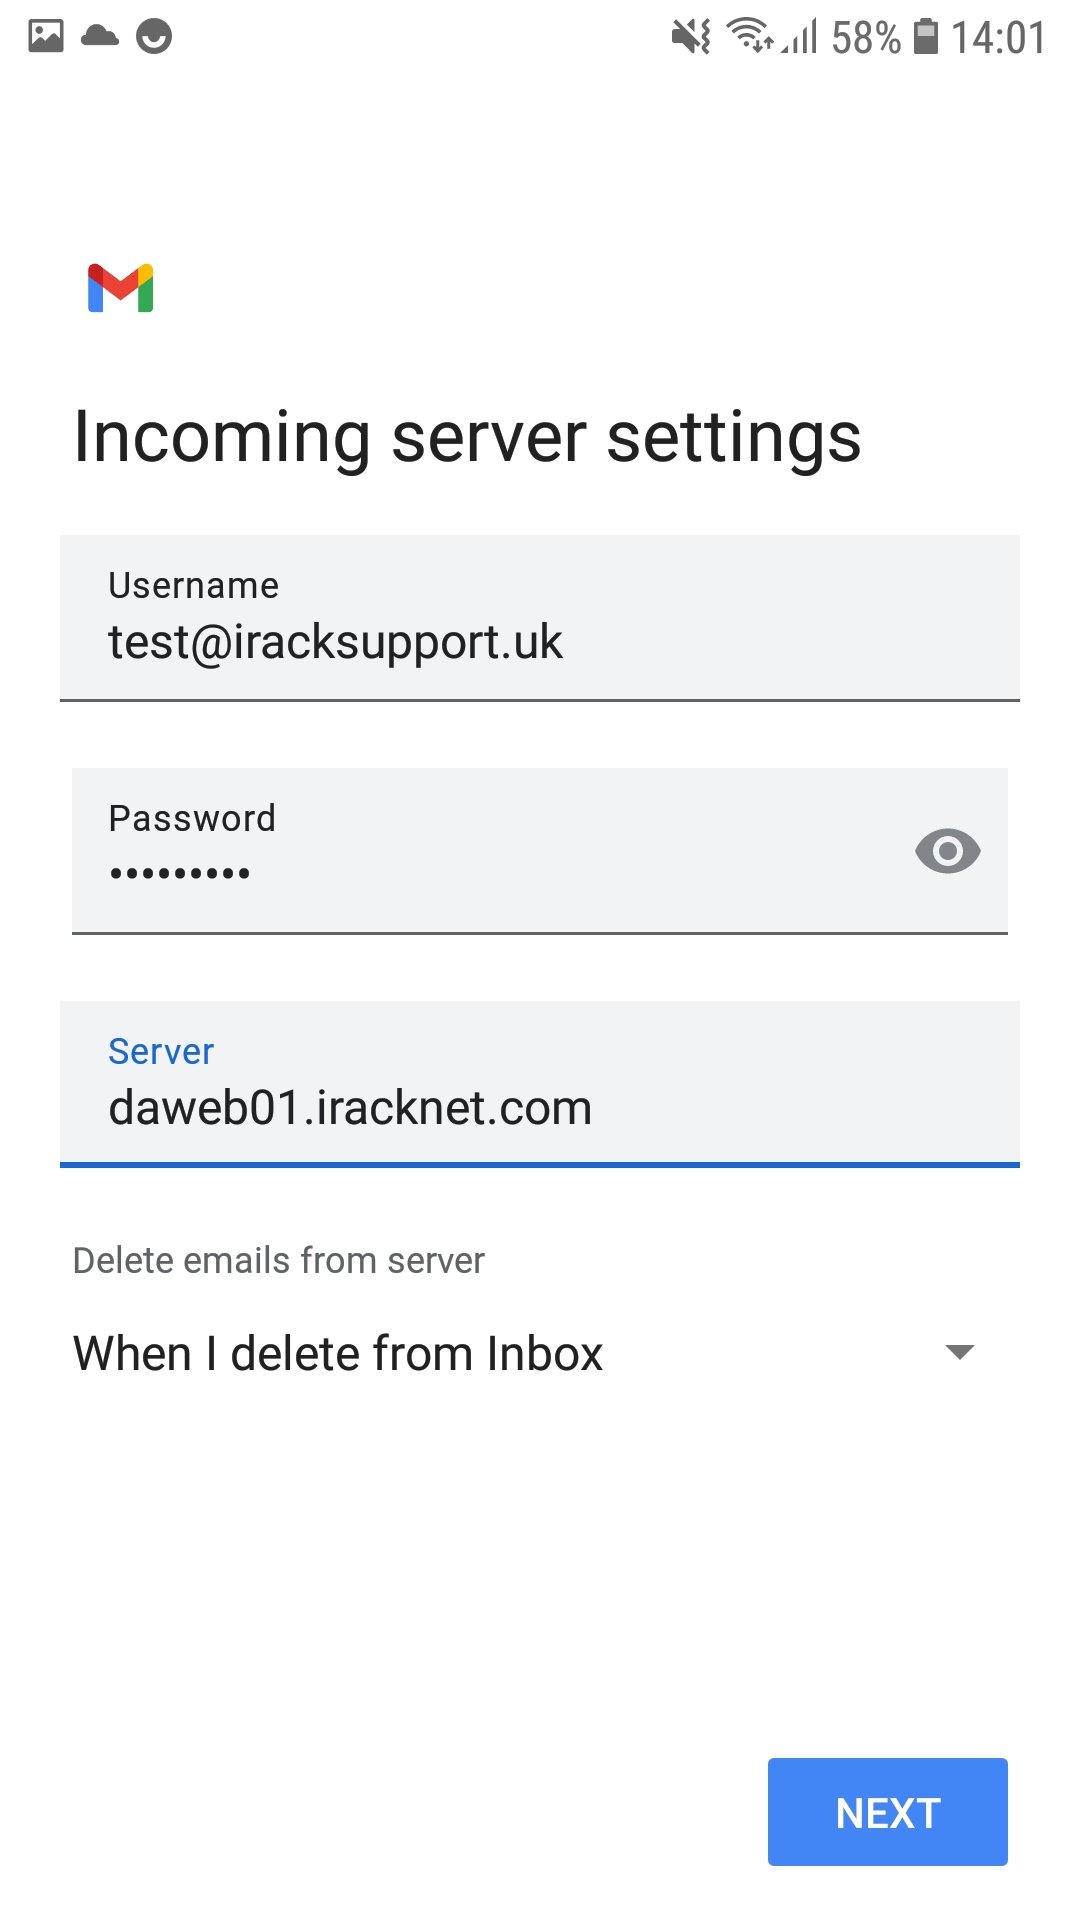
You will now be asked to enter the incoming server settings. Make sure the username is your full email address and also enter your email password in the password field. Then you need to enter the incoming server daweb01.iracknet.com (It's a zero) as shown in the screenshow below. Then you can press next to move onto the next step.
Step 7
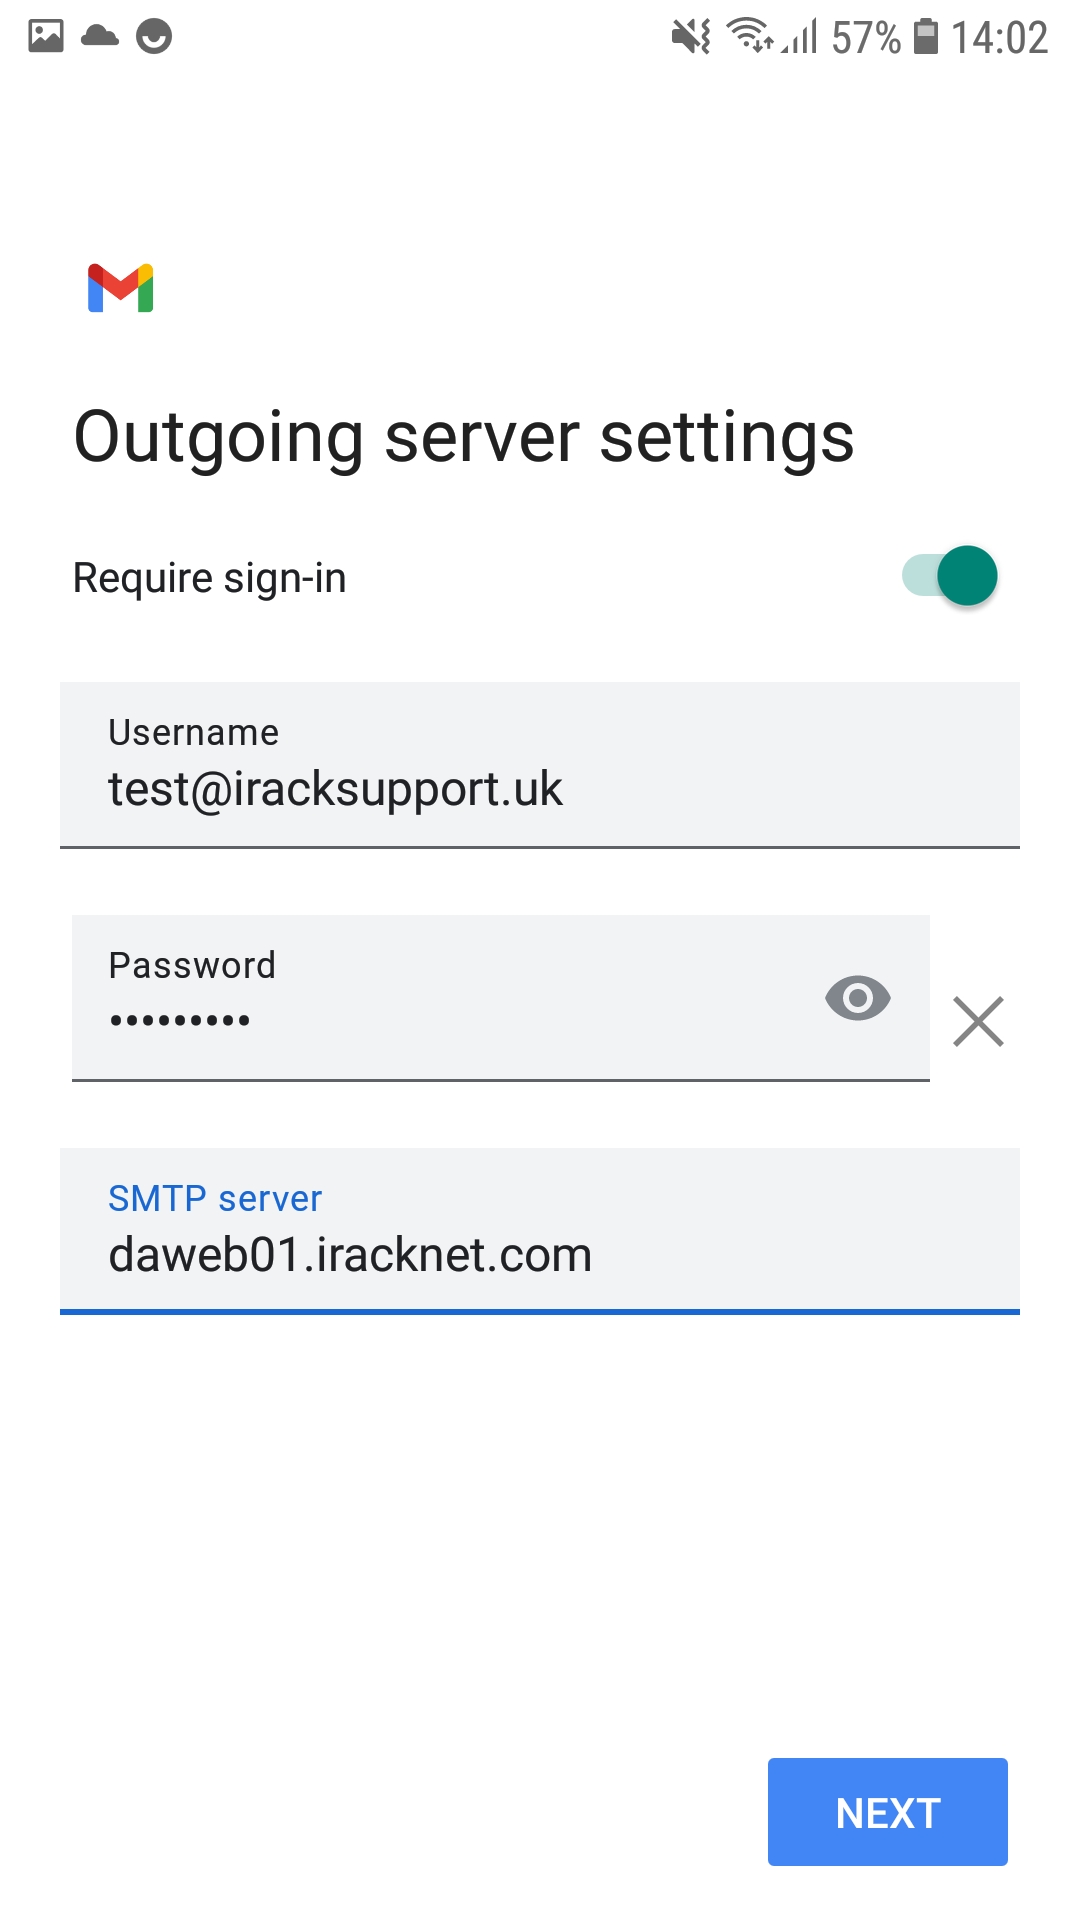
Make sure the username box is filled with your email address and that the password is also filled in. In the SMTP server box you need to enter daweb01.iracknet.com and then press next as shown in the screenshot below.
Step 8
Finish the setup by changing some of the personal settings to get the account successfully added to your Gmail app.
Tip: How to switch between multiple accounts in the Gmail App
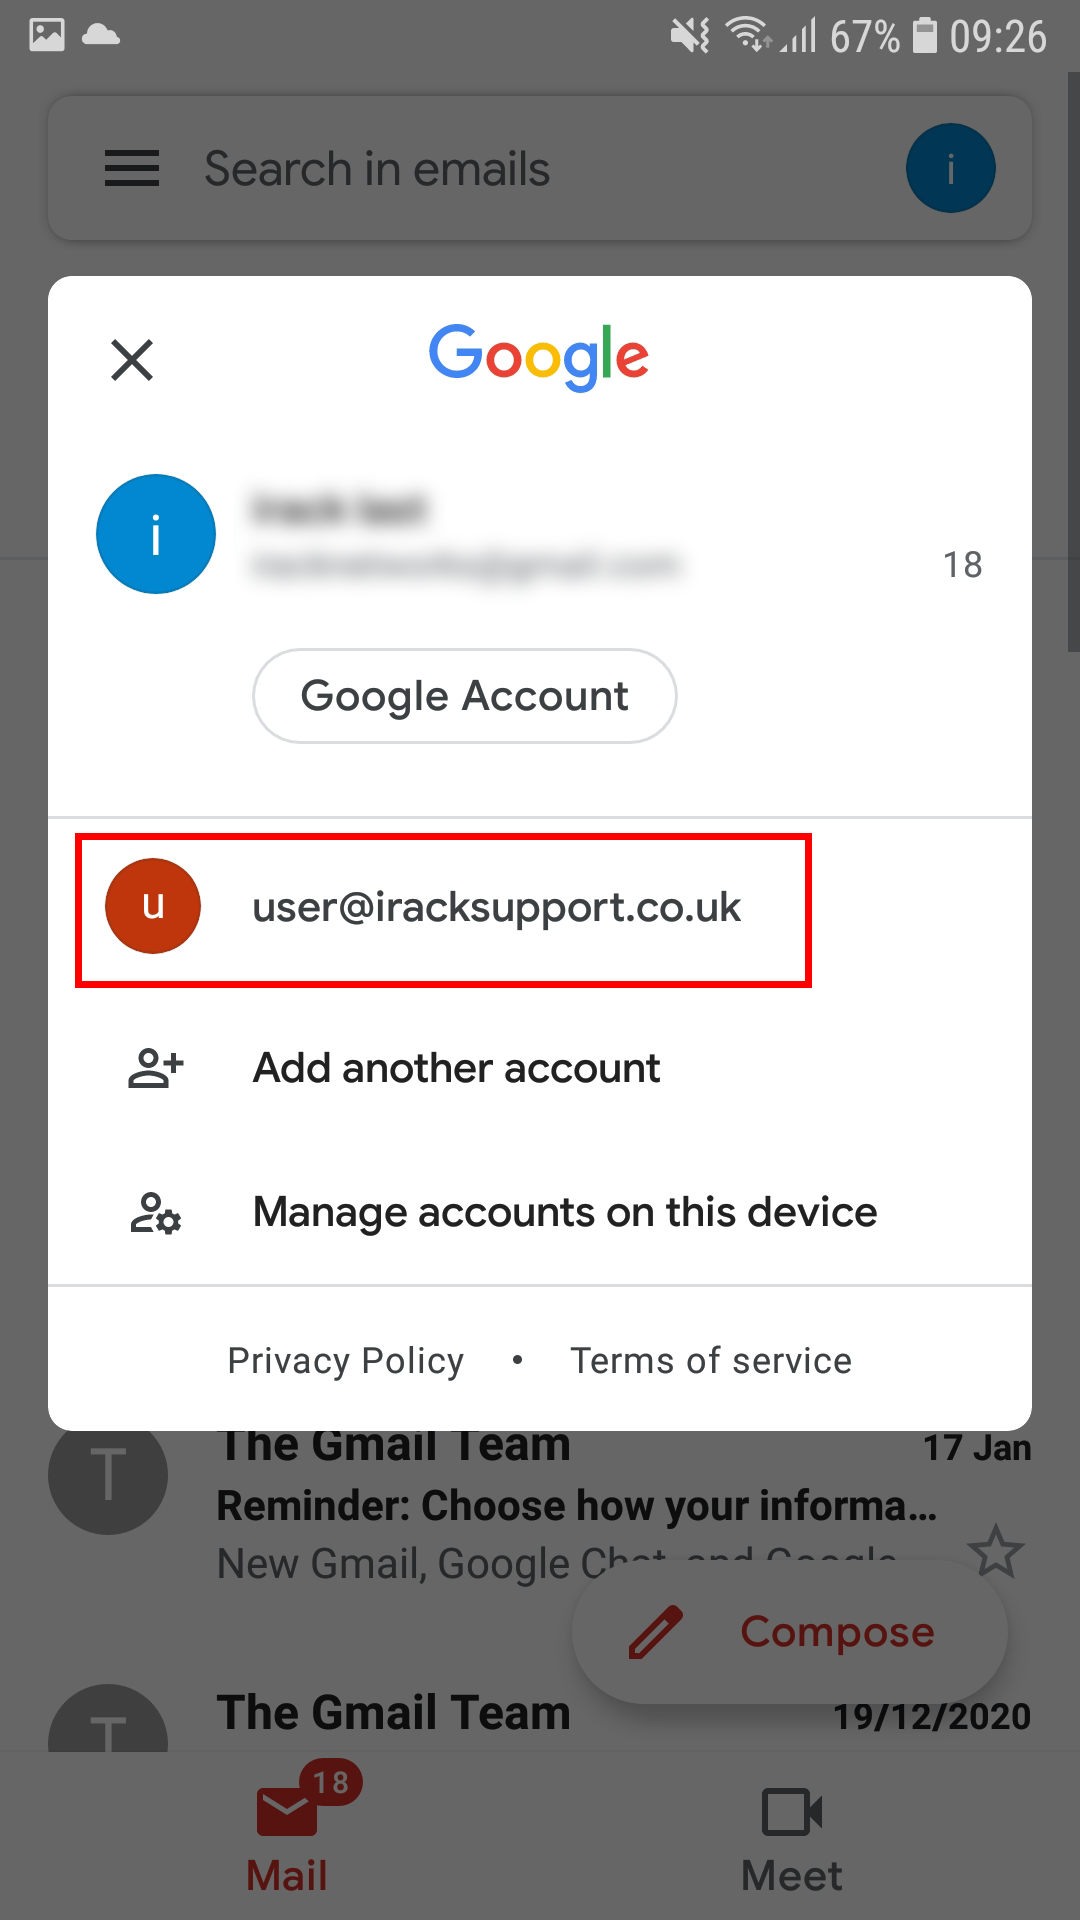
After the email account is added you can go back to the Gmail app to send/recieve emails. If you have multiple accounts in the Gmail app then you need to select the profile picture in the top right hand corner (highlighted by a red box in the screenshot below)
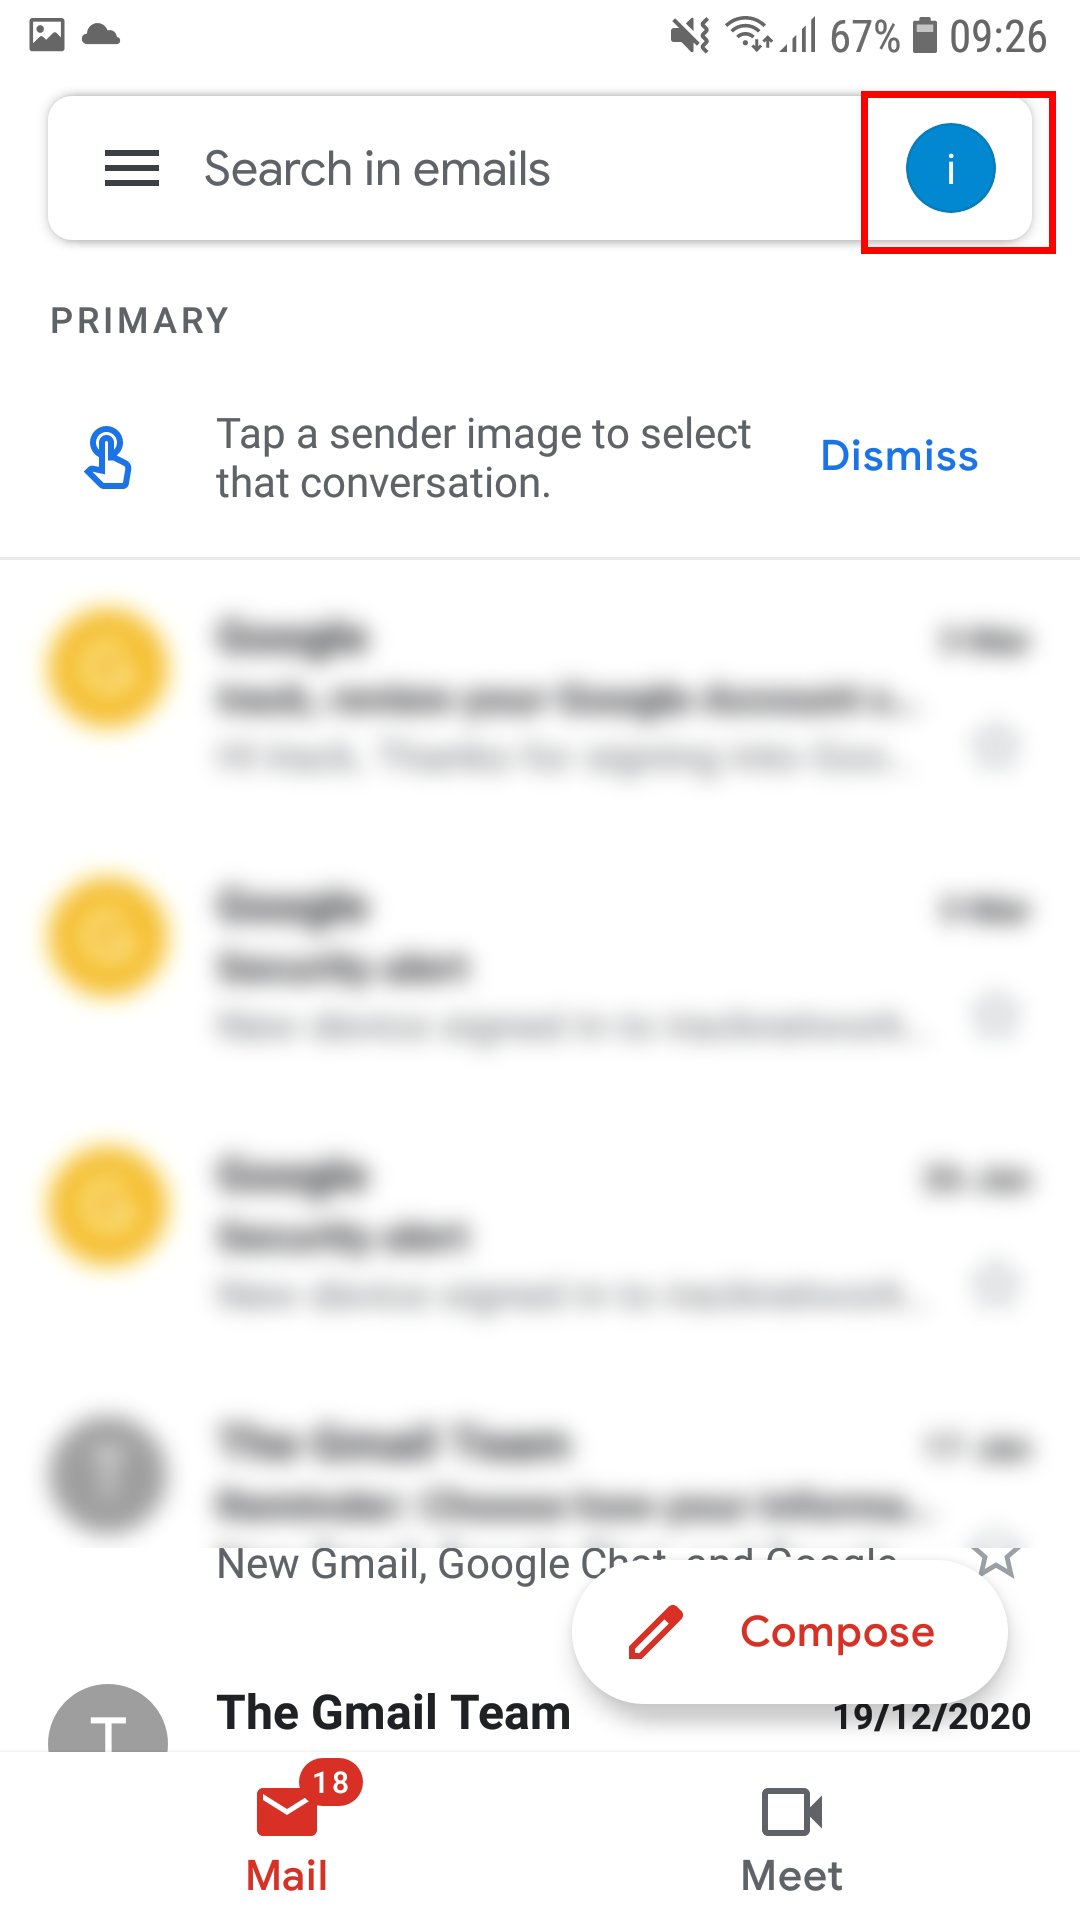
Then if you do have multiple accounts you will see those listed here. If you click on the account you want to use, it will load the Inbox and other folders for that specific account.
